There a few reasons why you might want to build your own distribution.
You could create a standard distribution, but with a desktop that you are more comfortable with.
You might need to put something small and lightweight together for an older computer.
You might need to build a live media ISO that you are able to carry around with you and to bring your favourite set of tools to bear when you need them.
SUSE Studio allows you to build a customised SUSE Linux installation using a web interface.
Start by setting up an account on the SUSE Studio website (http://susestudio.com).
You do this by following the 'Sign In Or Create An Account' link on the front page.

After creating a new account or using one of your existing social networking accounts such as Facebook, Google or OpenID , click on 'Create New Appliance...' functionality under the Actions.
On the next screen, choose the GNOME Desktop base template, making sure that you are selecting from the templates that relate to the latest version of SUSE Linux.
Scroll down to the bottom of the window to choose your architecture and then give your appliance a name and click 'ok'.

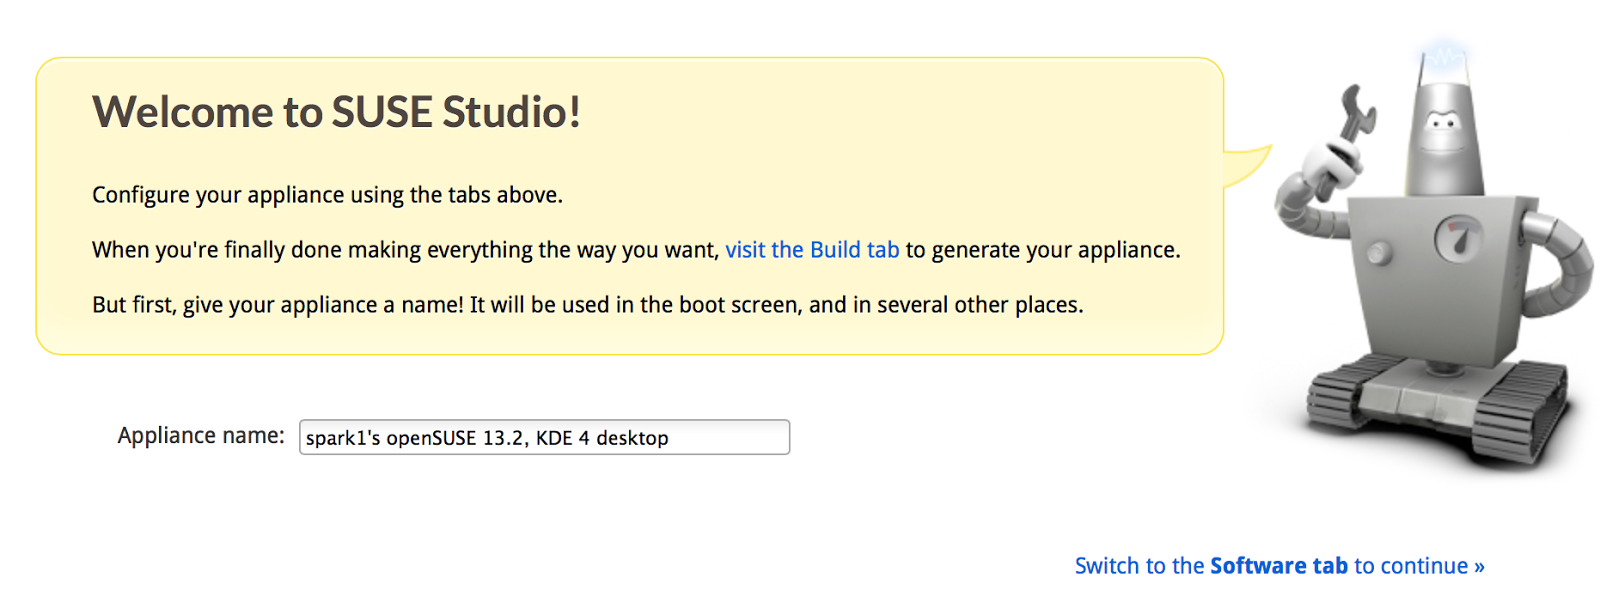
You will get a page as below and next step is to configure your appliance.
Start with the 'Software' tab. Let's say you'd want to add Office to your desktop, then type the word 'libre' into the search box. The packages are by default sorted by popularity; the OfficeLibre package will be displayed on the top of search list.Click the '+add' button to add this package.


You could create a standard distribution, but with a desktop that you are more comfortable with.
You might need to put something small and lightweight together for an older computer.
You might need to build a live media ISO that you are able to carry around with you and to bring your favourite set of tools to bear when you need them.
SUSE Studio allows you to build a customised SUSE Linux installation using a web interface.
Start by setting up an account on the SUSE Studio website (http://susestudio.com).
You do this by following the 'Sign In Or Create An Account' link on the front page.
After creating a new account or using one of your existing social networking accounts such as Facebook, Google or OpenID , click on 'Create New Appliance...' functionality under the Actions.
On the next screen, choose the GNOME Desktop base template, making sure that you are selecting from the templates that relate to the latest version of SUSE Linux.
Scroll down to the bottom of the window to choose your architecture and then give your appliance a name and click 'ok'.
You will get a page as below and next step is to configure your appliance.
Start with the 'Software' tab. Let's say you'd want to add Office to your desktop, then type the word 'libre' into the search box. The packages are by default sorted by popularity; the OfficeLibre package will be displayed on the top of search list.Click the '+add' button to add this package.
Add Firefox too. You can also add extra repositories and even custom RPM packages.
Proceed to the Configuration tab and select the General sub-tab. In here, select your language and keyboard layout and leave the other options as default.
Moving to the Personalize sub-tab of the Configuration page, we can now add some custom branding. Upload/select your logo and background.
In the 'Desktop' sub-tab, you can select the 'Automatic desktop user log in' option.
In the 'the Appliance' sub-tab,you can define the parameters of a virtual machine that will directly boot within a visualiser, if you want to create a VM environment. Here, you can choose options such as allocated memory and set up the LVM partition arrangement.
The Files tab is worth a visit if you need to add custom files to the distribution. You can add single files or archives. For example, if you wanted to add a file to the desktop of every new user, you should upload it and specify that it should be placed.If you wanted to place a file within the home directory of the user that you have created called tux, add it to '/home/tux'.
Now you can move to the 'Build' tab. In order to create a traditional installation ISO, select 'Preload ISO (.iso)' in the Default format and click on the 'Build' icon.
This can take a few minutes to complete, depending on how large and complicated your custom image is.Once built, your appliance remain on the site for a few days and can be downloaded. The tab 'Share' allows you to share your finished appliance with other users.
Boot the finished ISO, same as any other installation ISO.
No comments:
Post a Comment